16 Choose-Your-Own-Adventure Service Projects

Ministry, Resources, Uncategorized, youth ministry

Just one week before our youth mission trip to St. Louis—and right before a major holiday—our only scheduled service project completely fell through. With a group of teens ready to serve and no time to secure new partners, I had a choice: panic… or pivot.

So instead of “crashing out” (as the kids say), I reimagined the entire structure of our service day.

And while most of the projects weren’t uniquely tied to St. Louis, that almost made them more magical. The youth kept asking, “Can we do this at home too?”—which, of course, was the real win.

To add: some of these are… unique. Because we had originally planned to do a VBS, I had some crafts such as Wreaths and Flower Pots that I was wondering if I could repurpose a little for service projects. But I think that was part of our magic! Many of these were also inspired from my community at Women in Youth Ministry. Need some creative last-minute ideas? These women will help!

I put the service projects on cards and laid them out on a table. Each project had a clear summary, budget, supply list, scripture verse, and a reflection question—so they were ready to completely own it.

I read the projects to the group all at once, let them talk about it, and when they were ready they came up and chose a card to do the next day. They had a half hour to plan during our evening gathering time, then the next morning had three hours to execute. I put the cash in a pencil pouch, handed it over to a youth in charge, and told them to tell our group where to go. They had full autonomy and did a phenomenal job!
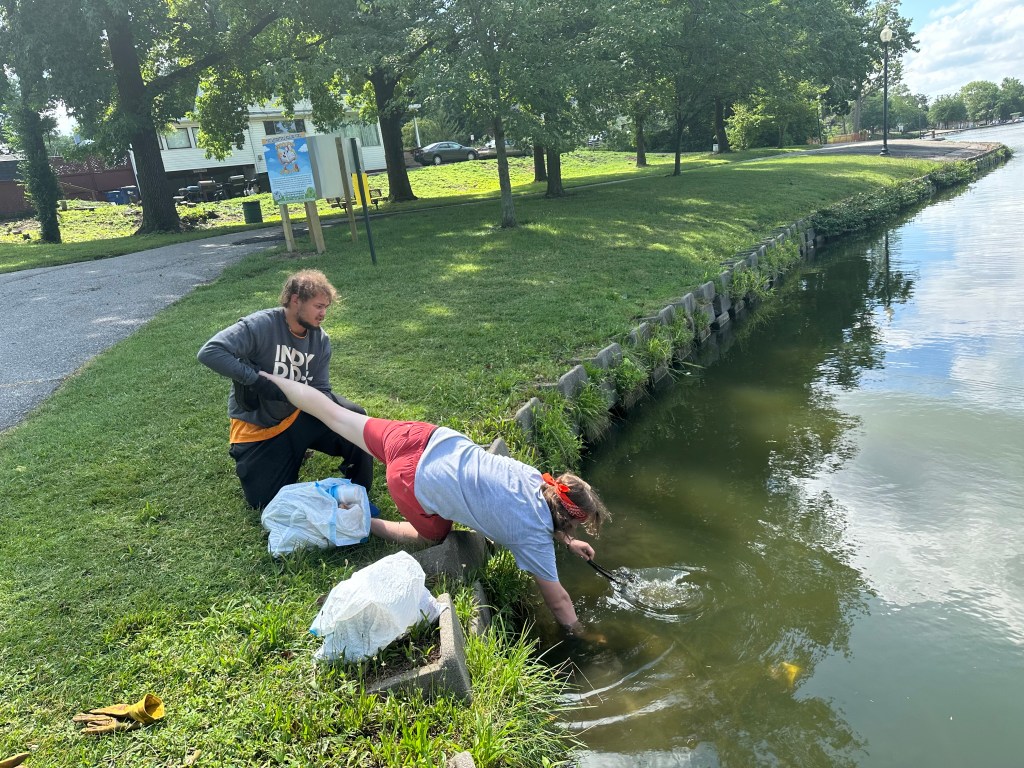
Park Cleanup

Summary: Help care for God’s creation by cleaning up litter and beautifying a local park.

Budget Guide: Low ($0–$20 for gloves, trash bags, optional snacks)

Supplies Needed: Trash bags, gloves, hand sanitizer, optional sidewalk chalk

Spiritual Goal / Verse: Genesis 2:15 – ‘The Lord God took the man and put him in the Garden of Eden to work it and take care of it.’

Reflection Question: What does it mean to take responsibility for a space we don’t own?

Little Libraries / Little Food Pantries

Summary: Stock and decorate neighborhood mini-libraries and food pantries with books, canned goods, and kind notes.

Budget Guide: $25–$100 for books, food staples, and decorating supplies

Supplies Needed: Books, canned goods, markers, notes, stickers

Spiritual Goal / Verse: Matthew 25:35 – ‘For I was hungry and you gave me something to eat.’

Reflection Question: How does sharing anonymously still help us feel connected?

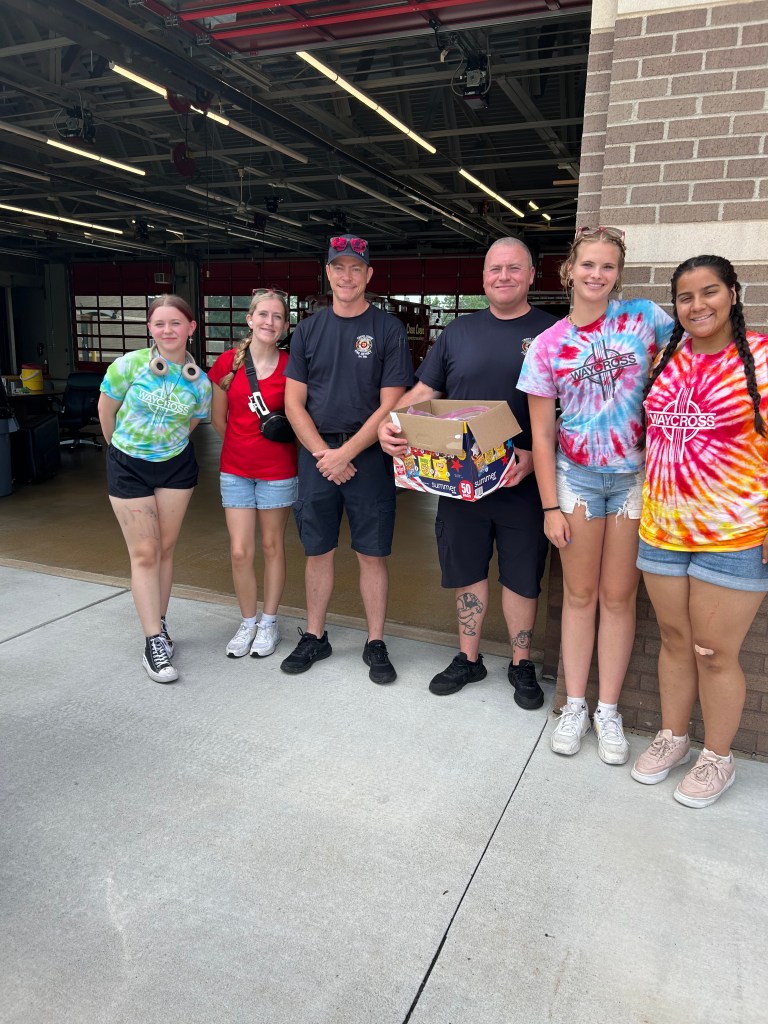
Cards & Treats for Local Police, Fire Stations, Emergency Room Workers, Etc.

Summary: Show gratitude to local first responders with handwritten cards and treats.

Budget Guide: $25–$75 for treats and card supplies

Supplies Needed: Thank-you cards, markers, store-bought snacks or baked goods

Spiritual Goal / Verse: 1 Thessalonians 5:11 – ‘Encourage one another and build each other up.’

Reflection Question: Why is it important to acknowledge people who serve in hard jobs?

Laundry Love

Summary: Leave quarters and detergent at laundromats for neighbors doing laundry.

Budget Guide: $25–$100 in quarters and supplies

Supplies Needed: Quarters, detergent pods, ziplock bags, tape, printed notes

Spiritual Goal / Verse: Galatians 6:2 – ‘Carry each other’s burdens, and in this way you will fulfill the law of Christ.’

Reflection Question: How does meeting a basic need reflect God’s love?

Hygiene Kits for Shelters

Summary: Assemble and donate hygiene kits for people experiencing homelessness.

Budget Guide: $50–$100 for bulk hygiene supplies

Supplies Needed: Toothbrushes, toothpaste, wipes, soap, socks, ziplock bags. You could also make menstrual supplies kits (tampons, pads, wipes, even reusable cups/discs).

Spiritual Goal / Verse: Proverbs 19:17 – ‘Whoever is kind to the poor lends to the Lord.’

Reflection Question: Why does dignity matter when helping others?

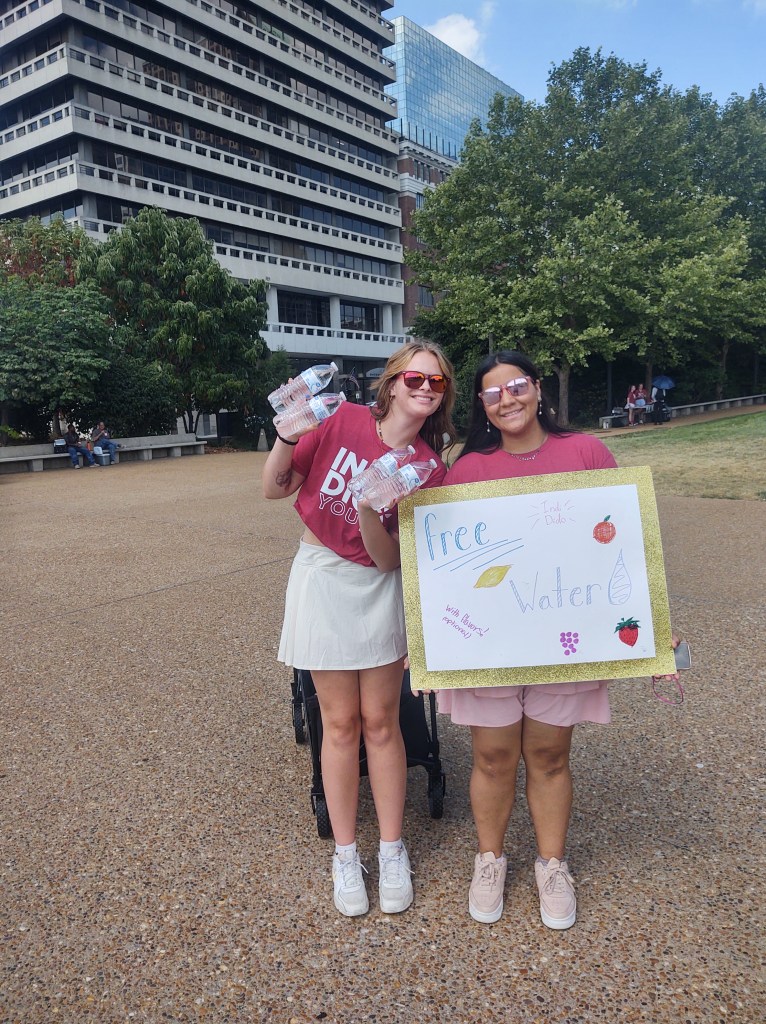
Water + Snack Giveaway

Summary: Hand out water bottles and snacks at parks or bus stops with affirming notes.

Budget Guide: $25–$100 for snacks and bottled water

Supplies Needed: Water bottles, snacks, handwritten notes or stickers

Spiritual Goal / Verse:: Mark 9:41 – ‘Anyone who gives you a cup of water in my name… will certainly not lose their reward.’

Reflection Question: What does it feel like to give without expecting anything in return?

Lemonade & Listening

Summary: Offer free lemonade and kind conversation in a local park or busy street corner.

Budget Guide: $20–$40 for lemonade supplies and signage

Supplies Needed: Cooler, cups, lemonade mix, poster board, markers, chairs

Spiritual Goal / Verse: Hebrews 13:2 – ‘Do not forget to show hospitality to strangers.’

Reflection Question: What can we learn when we stop to really listen to others?

“Ray of Sunshine” Baskets for the Homebound

Summary:  Create cheerful baskets filled with all yellow items and handmade cards to brighten the day of members of the church who are currently homebound. Coordinate with (insert church’s name) contact list.

Budget Guide: $100 total

Supplies Needed: Yellow baskets/bags, yellow items (lemon drops, socks, journals, teas, candles, pens, etc), list from the church, handmade cards, tags for bags

Spiritual Goal / Verse: Philippians 1:3–5 – “I thank my God every time I remember you. In all my prayers for all of you, I always pray with joy.”

Reflection Question: How can we reflect God’s light to those who may feel forgotten or isolated?

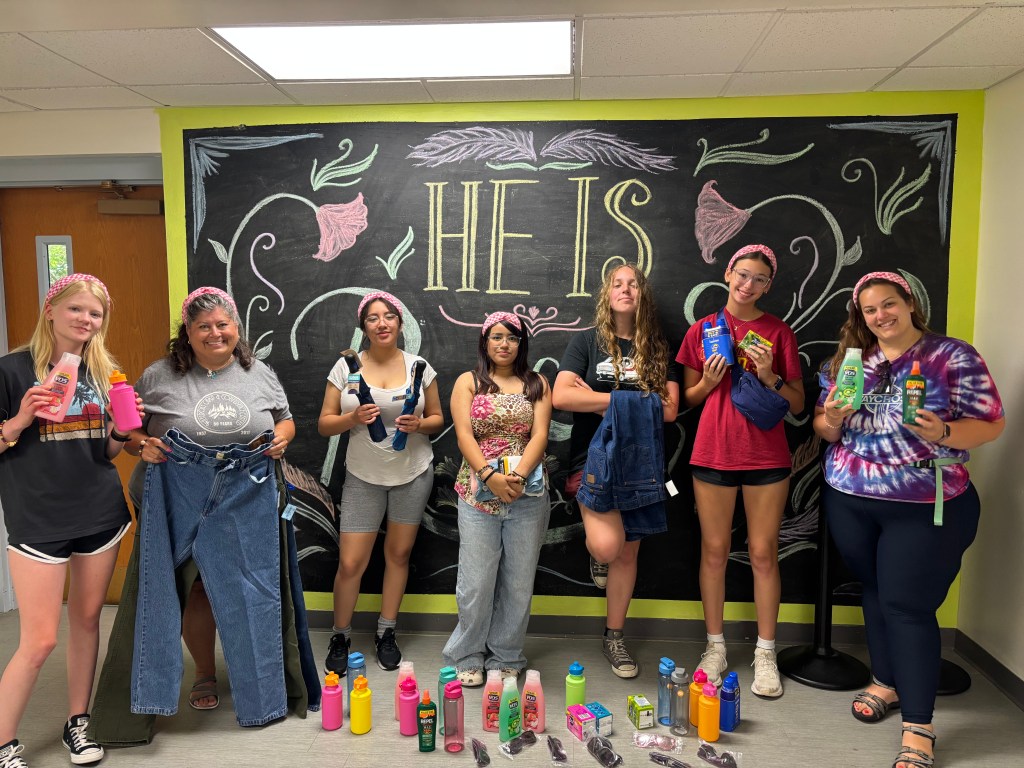
Unhoused Showers Ministry

Summary: Collect items for a local church or shelter’s Showers Ministry, which helps people who are unhoused.

Budget Guide: $100

Supplies Needed: Shower supplies – or check with the ministry’s list of needed supplies

Spiritual Goal / Verse:Isaiah 58:7 (NRSV) – “Is it not to share your bread with the hungry, and bring the homeless poor into your house; when you see the naked, to cover them, and not to hide yourself from your own kin?”

Reflection Question: What does it mean to see someone experiencing homelessness not as a stranger, but as kin?

Our group chose to donate these items to St. Charles UMC’s Shower Ministry, but any shelter or street outreach program would be blessed by this.

Diaper Blessings

Summary: Shop for diapers in a variety of sizes and donate them to a local diaper bank or shelter that serves families in need. Create handwritten cards or notes of blessing to include with the donation—something simple to encourage and uplift parents or caregivers.

Budget Guide: $100 total

Supplies Needed: Diapers, card-making supplies

Spiritual Goal / Verse: Psalm 127:3 – “Children are a heritage from the Lord, offspring a reward from him.”

Reflection Question: What does it mean to support someone you’ll never meet? How does this kind of giving reflect God’s trust in us to care for each other?

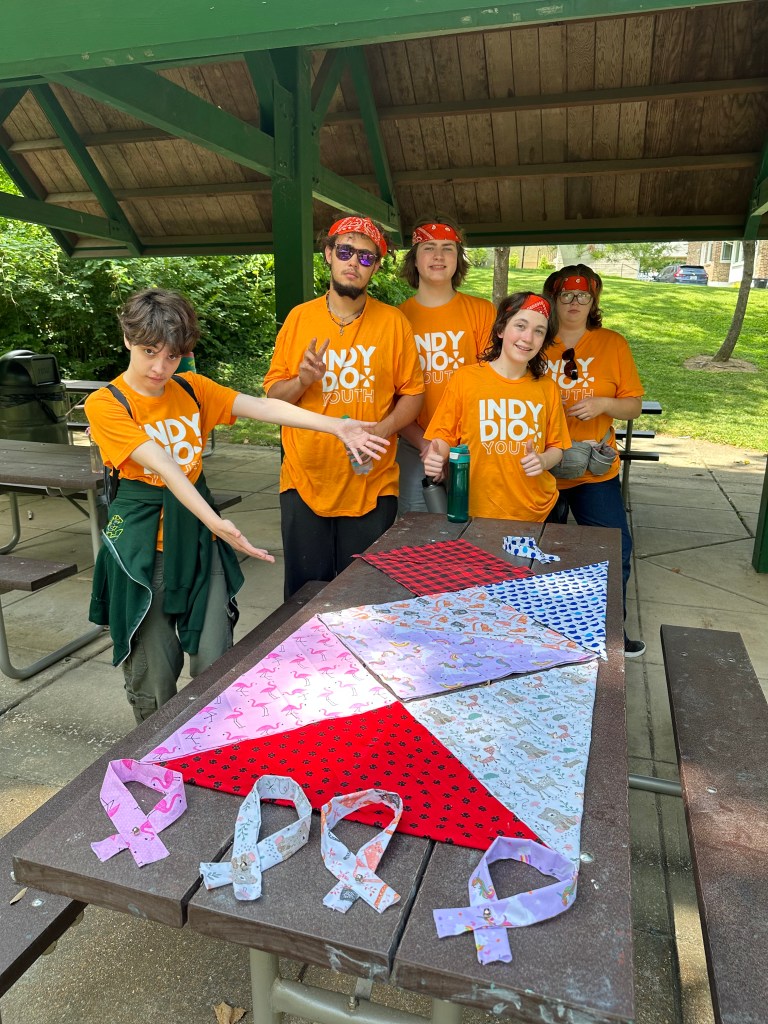
Bandanas for Pet Shelters

Summary: Create cheerful pet bandanas for animals in shelters to wear during adoption events. These small accessories can make pets more approachable and increase their chances of finding a forever home.

Budget Guide: $25–$75 for fabric, pinking shears, and optional fabric markers

Supplies Needed: Fabric from a craft stores, sharp scissors or pinking shears

Spiritual Goal / Verse: Proverbs 12:10 – “The righteous care for the needs of their animals.”

Reflection Question: How can simple acts of kindness toward animals reflect God’s love for all creation?

Dollar Tree Dinners

Summary: Create shelf-stable, low-cost meal kits. Each kit should fit in a gallon-sized Ziploc bag and include a simple recipe card. Drop off at a local food pantry to help people prepare a full meal with ease. Dollar Tree Dinners on TikTok has a examples.

Budget Guide: $100 total

Supplies Needed: Gallon-sized Ziploc bags, shelf-stable meal ingredients, index cards, markers/pens

Spiritual Goal / Verse: James 2:15–16 – “If a brother or sister is poorly clothed and lacking in daily food, and one of you says to them, ‘Go in peace, be warmed and filled,’ without giving them the things needed for the body, what good is that?”

Reflection Question: How can meeting someone’s basic needs also help them feel seen, valued, and loved?

Food Pantry Restock

Summary: Many food pantries are facing shortages and budget cuts. This project invites you to research a local pantry, discover their most-needed items, and use your group’s budget to shop thoughtfully. Your donations will help restock their shelves and ensure families have access to what they need.

Budget Guide: $100 total

Supplies Needed:

Spiritual Goal / Verse: Matthew 25:35 – “For I was hungry and you gave me something to eat.”

Reflection Question: How does feeding someone—whether you know them or not—connect us more deeply to God’s love?

Because St. Louis experienced a tornado, we did a collective Tornado Relief drive. We dropped bags off on Monday and got them on Thursday – taking two days of our week!

Joy Wreaths for Nursing Homes

Summary: Research local food pantries and look up what they are in most need of right now. Many food pantries have lost funding.

Budget Guide: $100 total

Supplies Needed: Wreaths (we have cardboard wreaths), items from a craft store/dollar tree. Use cord/string for hanging.

Spiritual Goal / Verse: Romans 15:13 – “May the God of hope fill you with all joy and peace in believing, so that you may abound in hope by the power of the Holy Spirit.”

Reflection Question: How can a simple, handmade gift become a reminder of God’s joy and presence in someone’s life?

Flower Pots for First Responders, Nursing Homes, etc.

Summary: Decorate flower pots and plant seeds as a symbol of gratitude, growth, and care. Pair each pot with a handwritten thank-you card and deliver to people who serve or may feel forgotten—such as first responders, healthcare workers, nursing home residents, or long-time church members.

Budget Guide: N/A – items in stock!

Supplies Needed: Thank-you cards, markers, flower pots, peats, seeds, paint markers

Spiritual Goal / Verse:  1 Corinthians 3:6–7 – “I planted, Apollos watered, but God gave the growth. So neither the one who plants nor the one who waters is anything, but only God who gives the growth.”

Reflection Question: How can small, thoughtful actions plant seeds of gratitude and hope in someone else’s life?

Create Your Own!

Summary: Come up with your own service project! Stay within budget and submit your plan to a leader.

Budget Guide: Up to $100

Supplies Needed: Whatever your group dreams up!

Spiritual Goal / Verse: Ephesians 2:10 – ‘For we are God’s handiwork, created in Christ Jesus to do good works.’

Reflection Question: What needs are you noticing that others might miss?


Click here to download the simple cards I made in Microsoft Word!

Craftivism: A Creative Approach to Justice for Youth

curriculum, Events, lessons, Resources, Theology

At our 2024 Fall Retreat, we embraced an approach to justice that felt as cozy as it was radical—Craftivism. Eight themed “Stations of Craftivism” offered youth the opportunity to engage deeply with issues of justice, faith, and community through creativity, contemplation, and action.

Craftivism, a term coined by Betsy Greer in 2003, is “a way of looking at life where voicing opinions through creativity makes your voice stronger, your compassion deeper and your quest for justice more infinite.” It’s gentle protest—resisting injustice not through confrontation, but through creation, connection, and compassion.

My interest in craftivism began when I attended Princeton Seminary’s Forum on Youth Ministry in May 2024. During worship, we used crafts to engage with Lectio Divina. The youth leaders I brought with me were really into it and asked if we could replicate something similar at our Fall Retreat. While researching ideas for a “crafty Lectio Divina,” I stumbled upon the concept of craftivism. Forty hours of deep-diving later, I partnered with one of our incredible volunteers who helped bring the vision to life. I developed the concepts, and she made them tangible—creating the printouts and finalizing our materials.

Each of our eight stations tackled a different cause through a hands-on project paired with scripture, prayer practices, and reflective prompts. I chose the causes based on research into what young people care most about today. Here’s a snapshot of that data:

Position%Source
Federal government needs to step in to Climate Change672021 Pew Research
Stricter gun control laws632022 Harvard Youth Poll
Black Lives Matter movement772020 Pew Research
Same-sex marriage772021 Gallup
Transgender Rights672019 Public Religion Research Institute
Increased government funding for mental health services722022 Pew Research
Legal access to abortion692022 NBC News/Generation Lab
Voted in 2020 US Presidential Election if eligible50CIRCLE
Believe immigration strengthens the US692021 Pew Research

We designed the following eight stations to reflect these passions:

🪨 Kindness Rocks – Mental Health Awareness
Participants painted uplifting messages on rocks to remind others that mental health struggles are real and valid. Scripture and breath prayers helped us root in hope and shared healing.

🏳️‍🌈 Button-Making – LGBTQ+ Equity
With markers and button-makers, students crafted wearable affirmations of love and inclusion for queer youth. Through imagination prayers and powerful quotes from Baldwin and Giovanni, we dreamed of a more expansive, welcoming world.

✉️ Postcards – School Safety & Gun Violence
Postcards became vehicles for advocacy as students wrote to their legislators about the need for safer schools. Prayers encouraged empathy, not apathy, reminding us that “slow advocacy” still moves mountains.

🪧 Positive Posters – Racial Reconciliation
Participants made bold, affirming posters to display in homes and churches, declaring solidarity with marginalized communities. Prayers of confession and calls to anti-racist action reminded us that reconciliation is a practice, not a point of arrival.

🎀 Woven Prayers – World Peace
With ribbon and a communal loom, students tied written prayers for peace in Ukraine, Sudan, Palestine, and more. A practice in silent prayer grounded us in empathy and global awareness.

🛍 T-Shirt Upcycling – Recycling & Waste Reduction
Old shirts were transformed into reusable bags as a statement of environmental care. We reflected on what it means to be stewards of God’s creation—and how small changes can echo holiness.

🚩 Flag Decorating – Immigration Justice
Each participant decorated a flag representing a piece of their heritage, adding it to a growing wall of shared stories. Through ancestor meditation, we remembered: every journey has a sacred story.

🧩 Puzzle Pieces – Neurodiversity
A collaborative art station where participants colored puzzle pieces to honor neurodiversity. With tear-off affirmations and praying in color, we celebrated every mind as fearfully and wonderfully made.

These stations were more than arts and crafts—they were holy spaces for contemplation, protest, and community-building. Each project invited youth to slow down, reflect, and act—not out of shame or fear, but out of love. Whether they painted rocks or stitched their truth into a button, every act was sacred. Every piece mattered.

Because justice isn’t just something we fight for—it’s something we create together.

Download Here!

Navigating Faith and Sexuality: A New Curriculum

lessons, Ministry, youth ministry

I grew up in purity culture. I wore the ring. I signed the commitment card. I was handed a box that supposedly represented my virginity and was told not to open it until I got married. Believe it or not, I still have all of it tucked away somewhere—relics of a theology that taught me rules, but not reflection.

Then I started working in mainline churches. And I realized something: progressives don’t talk about sex in church. Or so I thought. Working in progressive church spaces is funny; I’d have one parent say, “Don’t you dare tell my kid that sex is a sin,” and another say, “Can you please tell my teen to stop having sex?” I couldn’t win. And honestly? Neither could our students.

So my assistant director and I decided to do something about it. We created a four-week curriculum on faith and sexuality—one that speaks honestly, affirms LGBTQIA+ identities, and offers students something better than silence or shame. We rooted the series in the Wesleyan Quadrilateral, a framework that invites students to consider Scripture, Tradition, Reason, and Experience when wrestling with life’s big questions—especially when the Bible isn’t crystal clear.

Does God care about our sexual lives? Yes. Because God cares about our whole lives. But what God says about sex isn’t always as black-and-white as we were told growing up. That’s why this curriculum doesn’t aim to give every student the same answer—but to equip them with tools to form their own faithful, thoughtful, Spirit-led convictions. Spoiler alert: those convictions might look different for each student. And honestly? That’s the hope.

After we shared this series with our own students, it was picked up by Reconciling Ministries Network—an affirming branch of the United Methodist Church—and is now being shared with churches across the country. Our prayer is that this becomes a flexible resource for your ministry too. Feel free to adapt, edit, and shape it to meet your context.

Just—whatever you do—don’t stay silent. Our teens are listening. Let’s make sure they hear something worth holding on to.

Series Overview

Week 1: Developing a Faithful & Healthy Sexual Ethic

Bottom Line: We should view sex through a Christian worldview.
This week introduces the Wesleyan Quadrilateral—Scripture, Tradition, Reason, and Experience—as a framework for building a personal sexual ethic. Instead of issuing rules, it invites students to wrestle with how their faith informs decision-making. The big message? Your faith can and should shape your view of sex, but it’s not about fear or shame—it’s about trust, wisdom, and grace.


Week 2: Called to a Higher Standard

Bottom Line: As Christians, we are called to a higher standard. However, we are not to shame others for their decisions.
In this session, we explore how following Jesus means choosing what’s beneficial, not just what’s acceptable. We talk about being intentional in our relationships, valuing people over objectifying them, and embracing grace instead of shame—both for ourselves and others.


Week 3: Valuing Others vs. Objectifying Others

Bottom Line: As Christians, we are called to value others, not objectify them.
This week dives deeper into two key areas: lust and pornography, and consent. It challenges students to think critically about how culture influences their views on sex, and affirms that healthy desire isn’t wrong—but using others for gratification is. We also unpack the dangers of porn, the importance of consent, and why we’re called to treat others with dignity and respect in every interaction.


Week 4: Pastor Panel Q&A

Bottom Line: Pastors answer your questions about faith and sex.
This week is dedicated to your students’ real questions—everything from “Is masturbation a sin?” to “What if I’ve experienced sexual abuse?” to “What does the Bible say about being queer and sexual?” A panel of pastors responds with love, honesty, and theology rooted in grace. This week models what it looks like to have vulnerable, faithful conversations about complicated topics—without fear and without shame.

Download Here:

50 Ideas to Try this Advent

Events, games

Look no further for ideas to spice up your Christmas party or use as a game during youth group. Here are 50 ideas (most of them I have personally done!) to try out this holiday season.

7 THEMES FOR EVENTS OR PARTIES:

Candy Cane Olympics: Create a bunch of games for students to play, and for every win they get a candy cane! At the end of the night, award the winner of the Candy Cane Olympics with an extra-special prize.

Reindeer Games: Divide the group into reindeer teams and host an evening of games with a grand prize.

Reindeer Hunting: Have a small group pile into a car, grab hot-chocolate from the gas station / Starbucks, and go around neighborhoods with Christmas lights. Together, count the amount of reindeer you see. Each year I try to break the record from the year before!

Salvation Army Red Kettle: Volunteer as a small group together to ring the kettle together and sing Christmas carols.

Progressive Dinner Party: Identify three host homes, and take students around for each piece of the meal: Appetizer, Main Course, and Dessert.

Angel Tree: As a youth group, host a family for Angel Tree. Encourage teens to donate money and buy gifts together or divvy up gifts among the group.

Christmas Pajama Party: Host a movie night where students can wear footie pajamas and binge-watch some holiday classics. Invite students to bring Christmas cookies or other snacks!

43 GAMES AND ACTIVITIES TO TRY DURING YOUR CHRISTMAS PARTY OR YOUTH GROUP:

Ugly Sweater Station: Take the classic ugly sweater party to the next level by having a station where students can make their own! Include: fabric markers, ribbon, stick-on bows, bells, felt Christmas shapes, and lots of hot glue.

Saran Wrap Ball Game: Wrap candy and small prizes in layers of Saran Wrap. Form a circle and go around the circle, rolling dice. When a player rolls a double, they unwrap the Saran Wrap and get the next prize. You could also try this out “hot potato” style,” where you play music, and where the ball stops, they unwrap one layer

Reindeer Antlers: Place two to three minutes on the clock. Teams must blow up and tie balloons, then stuff them into a pair of panty hose, and then put the pantyhose on one player’s head. Team with the best-looking antlers wins.

Wrap Battles: Place five minutes on the clock. Give each team one roll of wrapping paper, tape, Christmas bows, and ribbon. Each team wraps one player, and the best-wrapped player’s team wins!

White Elephant: To keep your gift exchange cheap for families, consider having students bring random things from around their house, their best gag gifts, or regift something from last year.

The Dice Game: I grew up playing this game at my grandma’s! Purchase a bunch of small presents, ranging from chapstick to gloves to $5 gift cards. Wrap everything up. In small groups, place the gifts in the middle of the table and have each person roll. If someone gets doubles, they get to take a present (or steal one from someone else). They then get to roll again. If a person doesn’t get doubles, they pass the dice. You can also do with a coin – heads is open a present, tails is steal.

Gingerbread Houses: Make a station where students can create their own gingerbread house, or have a contest! Include items such as frosting, graham crackers, lots of candy, and pipe icing. We often just give small groups a pre-made Gingerbread house kit and some extra candy/frosting.

Christmas Cookie Decorating: You can use the same items as with the Gingerbread houses, except students can eat their art! You can also decide to do this with cupcakes.

Pancake: Place different colors of pancake mix in squeeze bottles, and encourage the students to make Christmas shapes on the griddle! You could even play Christmas Pictionary this way.

Sled Races: Give students a bunch of different items to make sleds! You can go micro and have them make sleds out of candy, or you can go macro and give them cardboard and other supplies. Then, have them race them across a track (micro) or across the room!

Sleigh All Day: Split students into groups. Give each group a cheap sled (they might break). Have the group get from one point of the room to the other without touching the ground using two sleds. If the touch the ground, they have to restart.

Ornament decorating: Get clear ornaments from Dollar Tree and a bunch of stuff to decorate (ribbons, pipe cleaners, stickers, jingle bells, etc.). Allow students to make ornaments to decorate the youth tree or take home!

DIY Christmas Stockings: Get a bunch of stockings and supplies from the Dollar Tree, and allow students to make their own!

Gift-wrapping: Encourage students to bring gifts to wrap, or have a bunch of boxes to teach students new gift-wrapping techniques.

Christmas themed water color painting: Find some Christmas coloring pages, and cheap water color kits. Allow students to color the pages with water colors for a relaxing activity!

Santa’s Beard: In this game, rub Vaseline all over the chin and cheeks of the willing participants. Give them a minute to place as many cotton balls on their face as possible. Person with most cotton balls wins!

Christmas movie trivia: Create a Christmas movie trivia, find one online, or grab a public one from Kahoot!

12 days of Christmas Relay or Scavenger Hunt: have 12 pieces of paper or 12 items that represent the 12 days of Christmas. Then, call out “8th day” or “7th day” and they must grab it. Alternatively: they have to find the pictures/symbols around the church and then order them correctly’ the first to do so wins.

Hot Cocoa Bar: Set up a station of hot water with cocoa and apple cider packets. Include cinnamon sticks, peppermints/candy canes, chocolate chips, butterscotch chips, marshmallows in fun shapes, whipped cream, pirouettes, and sprinkles!

Christmas Photo Booth: This is your easiest photo booth you’ll ever create: collect Christmas hats, garland, ornaments, and anything else you might have on-hand to use in the booth. Students can take selfies or you can have a volunteer take Polaroids! You can also give points for “worst family photo”

Christmas Cards: Have students create cards for all of your church staff, small group leaders, volunteers, or whoever they might be able to make an impact on. They can make their own, or you can supply the cards!

Elf on the Shelf: For each week of Advent, hide the elf around your youth ministry space. Award a prize for the person who finds it first each week.

Marshmallow Man: In this up-front game, give students a bag of mini marshmallows and one minute. Person who can stack the most three-marshmallow snowmen in a minute wins!

Oh Christmas Tree: Give each player 36 Red or Green Solo Cups. First player to stack the 36 cups into a pyramid (Christmas tree) and put them back into a single stack wins.

All Through the House: Hide cut-outs of Santa throughout your building or space. In teams, players relay to find a Santa, then come back to tag the next person their team. The team with the most or fastest time wins.

Fill the Stockings: Get teams of two, and give one person a Christmas stocking and the other ping pong balls. Have the players toss the ping pong balls into the stockings. Team with the most in their stocking in a minute wins! If the teams run out of ping pong balls, they can run around and grab them off the ground.

Bow Roll: Take a bunch of bows and take the stickers off the back. Scatter the bows on the ground. Have no more than two or three participants put their arms at their side (I recommend taping the arms down) and give them one minute to roll around on the ground, collecting bows. Person with the most bows stuck to them in a minute wins!

Name that Tune / Finish the Lyrics / Gargle that Tune: Place some lyrics on the screen, and have students finish the lyrics or name the tune. You can also give them a song privately, have them gargle the tune with water, and have the audience guess! There are some versions of these games on DYM.

Christmas Pictionary / Charades / Etc.: a classic, allow students to write down ideas or choose from preselected ideas and act them out!

Trim the Tree: Give each player a bag of shatterproof Christmas Ornaments. Players race to get their ornaments on the tree by tossing them at the Christmas tree.

Bamboozled: Buy a bunch of weird-tasting candy canes from Amazon, and see if your students can guess the flavor!

Christmas Scavenger Hunt: Find one online or make your own: see if students can find certain Christmas items around the church!

Christmas Kareoke: Purchase a pass from Karafun, turn on parental controls, and have students sing Christmas (or other) songs!

Snowball Dodgeball: Host a dodgeball match, but with balled up paper!

Marshmallow toss: Toss marshmallows into wreaths for a classic “minute to win it” game.

Two truths and a lie: Christmas gift edition (choose two of their worst presents ever given, then a third that’s a lie)

Antler ring toss: One student wears antlers, the other throws rings made out of glowsticks or a hula hoop around them. There are also inflatable versions on Amazon!

Christmas Bingo: Our students love bingo. For prizes, include gift cards or small gifts that students would want (or can regift!)

Pin the nose on the reindeer: Make your own or find one from Amazon!

Candy Cane hook’em: Place a pile of candy canes on one end of a table, with a bowl on the other end. Give students a candy cane; they have to hook as many candy canes and transfer them as they can in one minute.

Santa Limbo: Spray paint a bar red and wrap white tape around it for a “candy cane” look and invite students to limbo!

Ornament Relay: Place an ornament on a spoon, and have students race them across the room relay-style!

Mitten Wrapping: Unwrap presents with oven mitts! You can choose to do this up-front style, where a few people compete to unwrap the same thing, but with different mitts.

FREEBIE: “iScream for Meme-o-Ween”

Events, games

Each year a team of youth staff and volunteers gets together and plans out our youth calendar together. For Halloween, we had two amazing ideas for youth events: “i-Scream” and “Meme-O-Ween.” We decided, why not combine them?

We usually have a fall party for our middles on our campus, with a hayride, pumpkin chunking, pumpkin painting, Scary-oke, and other fall components. This year, we decided to dial it back and have a few really simple elements.

Overview of the event

At our events, we typically do stations. For a three- hour event, we do 30 minutes of “up-front” games, almost 2 hours of stations, and 45 minutes for worship, an outreach-focused message, and door prizes.

Here is an overview of our stations for this event:

Activity Location 
Ice Cream Bar Brandt Lounge 
Scary-oke Confirmation Room 
What do you Meme? Games Balcony 
Game Room Game Room 
Laser Tag  Outside 

Meme-O-Ween Ideas

Up-front Meme Games:

  • From DYM: “Church Meme Showdown” – we had students move from one side of the room to the other. To be perfectly honest, this game flopped and I scurried to the next game.
  • “Name that meme” – I created this game – students would move from one side to another to decide which name matched the meme. I threw out fistfuls of candy to the winning team! CANVA LINK
  • From DYM: “Meme Me.” I called four people up on stage, and gave each of them a clipboard and paper and a pen (if you have whiteboards you could use those). I gave them 20 seconds to meme each image. The first person to 3 wins won!

COSTUME CONTEST:

Of course, we had a costume contest for the best meme-themed costume!

“What do you Meme?”

Having a “What do you Meme?” station was a very easy way to incorporate the meme. Note that you must get the FAMILY versions of “What do you Meme”, as the normal ones are safe for 14+ and can get very dirty.

MESSAGE: “It’s Fine”

I chose my favorite meme — the “It’s Fine” meme – to talk about how God gave us feelings, and it’s good to feel them.

i-Scream Bar

Of course, you have to start with the i-Scream Bar! We did a simple bar with vanilla, chocolate, and cookie dough bases. My favorite volunteer shopper did our shopping for toppings, and came up with:

  • chocolate sauce
  • caramel sauce
  • strawberry sauce
  • whipped cream
  • chocolate chips
  • butterscotch chips
  • heath chips
  • reeses peanut butter chips
  • mini marshmallows
  • andes chips

Other Fun Fall Party Ideas

  • Scary-oke: Purchase a subscription with Karafun, hook up to a TV, turn on the parental control settings, and allow students to pick songs and sing them!
  • Laser Tag: We rented an inflatable corn maze from our local inflatables company, and played laser tag inside of it with laser tag blasters we had on-hand.
  • Pumpkin Painting: In the past we’ve done pumpkin-painting as a more creative activity. The only downfall: It takes time to dry.
  • Hayride: In the past we’ve rented a Uhaul truck and open trailer, placed hay on it, and did our own “hay ride” on campus. This year we took a break and some of our kids were really bummed!

FREEBIE: The Amazing Race Youth Event!

games

Each year we do a “Mission Impossible” type-event, but this year I wanted to go a little different — “The Amazing Race!” I am a HUGE fan of game shows and competitive reality TV. The Amazing Race is something I can’t wait to tune in to each week. And making your own “The Amazing Race” isn’t very difficult to do!

I did this with both middle schoolers and high schoolers this month. The middle schoolers blasted through the event, as I think station leaders went a little easier on them than intended. The high schoolers took more time and the leaders gave less hints. For both events, I gave about an hour and a half — and both groups needed less than an hour. You live and you learn!

EXPLANATION OF AMAZING RACE:

  • Students will be in groups of 2-3 for “The Amazing Race”
  • Each group will be given an envelope that has the first Road Block on it (they will be mixed up so they all go to different stations first)
  • They will get to their Road Block where they will be met with a challenge.  It is important to get to your Road Block quickly, as most Road Blocks can only have 1-2 teams complete the challenge at a time.
  • Only one person from the team can complete the challenge, and they must take turns.
  • When the challenge is completed, they will get a ticket to the next Road Block.
  • Once they’ve finished all of the Road Blocks, they will come back to the Lodge (Pit Stop).
  • First-place team will receive a prize!
  • As teams finish, have an area for snacks & hangout.

GAME SET-UP

  • STATION CARDS
    • Print out Station Cards – CANVA LINK
    • We printed these on a poster printer on 24×36 inch paper, and cut out each station card to size.
      • Cut posterboard in half (hamburger style)
      • Each paper will be glued onto the posterboard
      • Outside – we taped posterboard to cones so they wouldn’t fly away. Inside, we taped onto walls.
    • But you can adapt to 8×11 or 11×18 as needed.
  • CHALLENGE CARDS
    • Print out Challenge Cards – CANVA LINK
      • Print on cardstock, full color. Print enough for each team.
      • Cut tightly.
    • ENVELOPES:
      • We purchased these Amazing Race Envelopes for the first round, because we wanted the classic “rip” moment.
      • However, to save money, we didn’t use envelopes for all of the stations.
      • We randomized the first round, and placed one of each station (or however many groups you have) into the envelopes to start.
  • When setting up stations, each staton should have all the items for that station, as well as the cards to the NEXT station and some PIT STOP cards.
  • Instruction Slides: CANVA LINK

EXPLANATION OF AMAZING RACE:

  • Students will be in groups of 2-3 for “The Amazing Race”
  • Each group will be given an envelope that has the first Detour/Road Block on it (they will be mixed up)
  • They will get to their Detour/Road Block where they will be met with a challenge.
    • Detour – they can choose from 2 challenges
  • When the challenge is completed, they will get a ticket to the next Detour/Road Block.
  • Once they’ve finished all of the Detour/Road Blocks, they will come back to the Lodge (Pit Stop).
  • First-place team will receive a prize!

General Instructions for Leaders:

  • When people get to your zone, have them make a line if you have more teams than can play at once.
  • Even though they have the piece of paper that explains it, go over the rules with them before they start playing the challenge.
  • If you are managing TWO stations, please have people pause so that you can address each station individually.
  • (INCLUDE CLEANUP INSTRUCTIONS FOR LEADERS!)

STATIONS

The following are the stations that we used. Feel free to use and adapt to your liking! We tried to use things that we already had on hand, and purchase minimal supplies.

STATION ONE: Tangram

  • SUPPLIES: Tangram puzzles (there are 6)
  • LOCATION: Upstairs Round Tables
  • INSTRUCTIONS: A tangram (Chinese for “seven”) is a dissection puzzle which consists of seven flat polygons, called tans, which are put together to form a shape. The objective is to to get all the puzzle pieces in the puzzle. Choose one player to accomplish this.
  • ADDITIONAL INSTRUCTIONS FOR LEADERS: There are 6 puzzles, so up to 6 people can work on this at once.
  • WHEN THEY ARE FINISHED: Give them a card to the next Roadblock/Detour!
  • WHEN SOMEONE TELLS YOU THEY ARE COMPLETELY FINISHED – check to make sure that all 12 challenges are in their hands. Then, hand them the “Pit Stop” Card.

STATION TWO: STACK IT HIGH OR STACK IT LOW

  • Supplies: 45 solo cups, 45 playing cards
  • LOCATION: Upstairs Café/Confirmation Room
  • INSTRUCTIONS – STACK IT HIGH OR STACK IT LOW
    • HIGH: Take 15 cups and stack on top of each other (end-to-end & opening-to-opening) to create a tower.
    • LOW: Take 15 cards and make a pyramid out of them.
  • ADDITIONAL INSTUCTIONS FOR LEADERS: There are enough items for 3 teams to do each task at a time. They can do these tasks as teams
  • WHEN THEY ARE FINISHED: Give them a card to the next Roadblock/Detour!
  • WHEN SOMEONE TELLS YOU THEY ARE COMPLETELY FINISHED – check to make sure that all 12 challenges are in their hands. Then, hand them the “Pit Stop” Card.

STATION THREE: FIND THE KEY

  • SUPPLIES: Master Locks, Ring of Keys (we purchased a bulk amount from Amazon)
  • LOCATION: Upstairs Round Tables
  • INSTRUCTIONS: You’ll have a ring of keys, but only one fits the lock! Choose one player from your team to accomplish this task.
  • WHEN THEY ARE FINISHED: Give them a card to the next Roadblock/Detour!
  • WHEN SOMEONE TELLS YOU THEY ARE COMPLETELY FINISHED – check to make sure that all 12 challenges are in their hands. Then, hand them the “Pit Stop” Card.

STATION FOUR: MEMORY GAME:

  • SUPPLIES: Memory Card Game
  • LOCATION: Lounge
  • PREP INSTRUCTIONS: Break down the memory card game into four different games with 12 countries each.
  • INSTRUCTIONS: You will receive a deck of cards. Place on the ground, face-up, then flip over. Match up the countries with each other. You get three strikes before you have to surrender the cards, move to the back of the line, and start over!
  • WHEN THEY ARE FINISHED: Give them a card to the next Roadblock/Detour!
  • WHEN SOMEONE TELLS YOU THEY ARE COMPLETELY FINISHED – check to make sure that all 12 challenges are in their hands. Then, hand them the “Pit Stop” Card.

STATION FIVE: EXERCISE OR EAT

  • SUPPLIES: Saltine Crackers
  • LOCATION: Lodge Lobby
  • INSTRUCTIONS:
    • EXERCISE: Choose one teammate to go up and down the stairs of the Lodge (up one and and down the other end) 5 times
    • EAT: Choose one teammate to eat 10 saltine crackers without water
  • ADDITIONAL INSTRUCTIONS FOR LEADERS: Have students go up one flight of stairs and then down the other flight. Remind them not to run down the stairs. If a student uses a wheelchair or needs to, they can use the elevator and go up/down it 5 times. Additionally, you may have one person go up the stairs at a time so they aren’t pushing.
  • WHEN THEY ARE FINISHED: Give them a card to the next Roadblock/Detour!
  • WHEN SOMEONE TELLS YOU THEY ARE COMPLETELY FINISHED – check to make sure that all 12 challenges are in their hands. Then, hand them the “Pit Stop” Card.

STATION SIX: DEAR LIZA

  • SUPPLIES: Kiddie Pool, 3 5-gallon buckets, 3 cups with large hole
  • LOCATION: Basketball Court
  • INSTRUCTIONS: Transfer the water from the kiddie bowl into the bucket. Here’s the catch: there’s a hole in your cup! You can choose to take turns or have one player accomplish this task.
  • ADDITIONAL INSTRUCTIONS FOR LEADERS: Instruct teams to dump the water back into the kiddie pool before they go or use the spicket to get more water.
  • WHEN THEY ARE FINISHED: Give them a card to the next Roadblock/Detour!
  • WHEN SOMEONE TELLS YOU THEY ARE COMPLETELY FINISHED – check to make sure that all 12 challenges are in their hands. Then, hand them the “Pit Stop” Card.

STATION SEVEN: SPOT THE DIFFERENCE

  • SUPPLIES: “Spot the Difference” Puzzle book, pens
  • LOCATION: Lounge
  • INSTRUCTIONS: At your station you’ll be handed a “Spot the Differences” Puzzle. Spot all the differences and turn it in! If you don’t find them all, you’ll have to start over with a new puzzle. Only one person can complete this.
  • ADDITIONAL INSTRUCTIONS FOR LEADERS: When someone comes to your station, hand them a puzzle from the book. Check the answers in the back of the book. If they fail, give them a new puzzle.
  • WHEN THEY ARE FINISHED: Give them a card to the next Roadblock/Detour!
  • WHEN SOMEONE TELLS YOU THEY ARE COMPLETELY FINISHED – check to make sure that all 12 challenges are in their hands. Then, hand them the “Pit Stop” Card.

STATION EIGHT: HOOP OR ROLL

  • SUPPLIES: Dice, basketball
  • LOCATION: Basketball Court
  • INSTRUCTIONS:
    • HOOP: Shoot 25 points at the basketball hoop (choose a spot for the “3-point line”)
    • ROLL: Roll 5 dice until they have “5” on them (they can roll them one at a time, 5 at a time, however they’d like)
  • ADDITIONAL INSTRUCTIONS FOR LEADERS: You only have a certain number of dice, so some people can only a certain number of students can play that game.
  • WHEN THEY ARE FINISHED: Give them a card to the next Roadblock/Detour!
  • WHEN SOMEONE TELLS YOU THEY ARE COMPLETELY FINISHED – check to make sure that all 12 challenges are in their hands. Then, hand them the “Pit Stop” Card.

STATION NINE: BULLSEYE!

  • SUPPLIES: Lawn Dart Kit
  • LOCATION: Lawn behind Lodge
  • INSTRUCTIONS: Get a bullseye using the Lawn Darts. Choose one member of your team to complete this. If you fail, you have to go to the back of the line.
  • ADDITIONAL INSTRUCTIONS FOR LEADERS: Have them make a line, each person can get 1 chance or use all of the darts, your decision. To save your back, have STUDENTS pick up the darts and hand off to the next person.
  • WHEN THEY ARE FINISHED: Give them a card to the next Roadblock/Detour!
  • WHEN SOMEONE TELLS YOU THEY ARE COMPLETELY FINISHED – check to make sure that all 12 challenges are in their hands. Then, hand them the “Pit Stop” Card.

STATION TEN: Pop-It!

  • SUPPLIES: Balloons, plastic bag for trash
  • LOCATION: Lawn behind Lodge
  • INSTRUCTIONS: Blow up ten balloons, then pop them with your butt. Only one team member can complete this.
  • ADDITIONAL INSTRUCTIONS FOR LEADERS: Have them pick up their popped balloons — there is a bag to throw away trash in. Make sure they blow their balloons up BIG.
  • WHEN THEY ARE FINISHED: Give them a card to the next Roadblock/Detour!
  • WHEN SOMEONE TELLS YOU THEY ARE COMPLETELY FINISHED – check to make sure that all 12 challenges are in their hands. Then, hand them the “Pit Stop” Card.

STATION ELEVEN: RUN OR ROLL

  • SUPPLIES: 3 ropes or bandanas
  • LOCATION: Playground
  • INSTRUCTIONS:
    • RUN – Tie two legs together and three-legged walk across the playground
    • ROLL – Create a wheelbarrow by one person grabbing the feet of another, and walk across the playground
  • ADDITIONAL INSTRUCTIONS FOR LEADERS: You may decide how long they have to go and where the starting line is.
  • WHEN THEY ARE FINISHED: Give them a card to the next Roadblock/Detour!
  • WHEN SOMEONE TELLS YOU THEY ARE COMPLETELY FINISHED – check to make sure that all 12 challenges are in their hands. Then, hand them the “Pit Stop” Card.

STATION TWELVE: LOSING OUR MARBLES

  • SUPPLIES: Kiddie Pool, Marbles
  • LOCATION: Basketball Court
  • INSTRUCTIONS: In a kiddie pool are a bunch of marbles. Choose one member of your team, and have them transfer 10 marbles out, one at a time, using just their feet!
  • ADDITIONAL INSTRUCTIONS FOR LEADERS: You may decide how many teams can do this at once.
  • WHEN THEY ARE FINISHED: Give them a card to the next Roadblock/Detour!
  • WHEN SOMEONE TELLS YOU THEY ARE COMPLETELY FINISHED – check to make sure that all 12 challenges are in their hands. Then, hand them the “Pit Stop” Card.

FREEBIE: Medieval Carnival

Events, games

This year we had to cancel our Fall Retreat due to low sign-up (story of student ministry post-COVID, amirite?). In ten days, we created THIS event, and boy — am I proud of it. We went with the Medieval theme because that was the theme of our fall retreat and we wanted to keep momentum so that students didn’t feel like something was “cancelled;” rather this was the new option.

We typically do stations at our events, so Carnival Games fit right into that theme!

Up-Front Games

We always start with some up-front games to get students warmed up. This month we played:

  • War: We divided students into two groups, and placed a deck of cards on a table in the front. Each player would turn over a card, and the top card (Ace) wins! The winner goes to the back of the line, the loser drops out
  • “How Long Would you Survive the Midieval Times?” I took a Buzzfeed Quiz and made it into a game. We played this “Four Corners” style, meaning students would go to one of 4 corners. If they chose the right corner they moved on. If they did not, they “died.” CANVA LINK
  • “Fact or Cap – Mideval Edition” – We called 10 people up on stage. If they got it correct, they got a small prize. If not, they lost. CANVA LINK

Carnival Games

STATIONLOCATIONSET UP INSTRUCTIONSGAME INSTRUCTIONS
Jousting GameOutside (inflatable) We rented a jousting inflatable. You could also do this with pool noodles and small platforms.1 ticket if you play 3 tickets if you win!
Axe ThrowingOutside (inflatable)We rented an axe throwing inflatable. You can also purchase a kit on Amazon. Hit the target – 1 ticket Inside middle black ring – 3 tickets Inside inner black ring – 5 tickets Fully-covered Bullseye – 10 tickets
Skee ballOutside We rented this game from our Inflatables guy, but you can make one or purchase one from Amazon.1 ticket for bottom hole, 3 tickets for middle hole, 5 tickets for top hole
Fishbowl Pong   “Fishbowl Feud”OutsideWe rented this game from our Inflatables guy, but you can make one or purchase one from Amazon. Scatter assorted amounts of tickets (1-5) in the fish bowlsToss a ping pong ball into the fish bowl & earn the tickets in that bowl!
Fish Pool “Go Fish”OutsideSet up kiddie pool, magnetic fish, and fishing poles (purchased from Amazon, we already had this on hand).Place one minute on the clock. Get tickets based on: 1 ticket – 1-3 fish 3 tickets – 4-7 fish 5 tickets – 8-10 fish 10 tickets – 11+ fish
Ring Toss (with traffic cones)   “Lord of the Rings”OutsideSet up 10 traffic cones and 3 hula hoopsGiven 3 rings. Get 1 ring = 1 ticket. 2 rings = 3 tickets. All 3 rings = 5 tickets
Duck Shooting Game   “Duck Hunt” We purchased this from Amazon. Place ducks on the ledge, and fill up water blasters with water. We had a cooler of water for fill-ups.1 minute on the clock! Shoot the ducks until they flip over. 1 ticket – 1-3 ducks 3 tickets – 4-7 ducks 5 tickets – 8-10 ducks 10 tickets – 11+ ducks
Mini-Golf   “squire’s golf” Cut a few holes in a box like this but with 1, 3, & 5 increments. Use a golf putter and golf balls (I borrowed from my husband!)Putt the ball into the holes, and get tickets for each hole you get!
Memory Game   “medieval memories” Use a deck of cards – lay face down on the table.Get 1 ticket for each match you can make! You have three strikes before you’re done.
Corn Hole   “bean bag baron” Use a corn hole set 3 chances to get a bean bag in the hole!

Prize Redemption Station

Games were played for tickets, which meant we had a prize redemption station. Here were the prizes we did:

  • 1 Ticket: stickers, pins
  • 3 Tickets: jolky rancher, laffy taffy, sour punch twists
  • 5 Tickets: slap bracelets, squishies, fidgets, slime
  • 10 tickets: nerds ropes, ring pops, blow pops
  • 30 tickets: full-sized candy (from dollar tree), caffeine-free pop

Snack Bar

Here are some ideas for potential medieval carnival foods!

  • Cotton Candy
  • Popcorn
  • Street Corn Bar
  • Turkey Legs

Message Idea

For this event, we have an outreach-focused message, meaning something that a visitor who has never been to church might be able to listen to without feeling uncomfortable. For this event, I talked about God’s “kin-dom” — that Jesus is a king unlike any other. Leaning on mujerista theology, I talked about how Jesus as a king teaches us that our faith is more about the community, not the king. This message was for middles, and they loved it!

FREEBIE: Poverty Simulation (that you can even use with middle schoolers!)

games, lessons, Resources

Poverty Simulations are a popular way to teach students what it looks like not only to live in poverty, but also how much it takes to pay for different things that they might take for granted.

I struggled finding a way to teach our middle schoolers specifically about poverty, especially since most poverty simulations are created with adults in mind, and adaptable enough for high schoolers. So, I created my own! You can adapt this simulation for any size group, with or without volunteers.

We played this for the first time this summer at our day camp for 5th though 8th graders, and we learned a lot! This can be a frustrating experience at first for middles — ours were ready to quit 5 minutes in because they ran out of money. But, it’s helpful to keep the game moving and just let them start over. After the second round, they will begin to get a hang of it! We also learned you need to print a TON of income sheets…. like more than I estimated.

HOW TO PLAY / INSTRUCTIONS:

PRINT TO PLAY:

QUESTIONS FOR DISCUSSION AFTERWARDS:

FREEBIE: Halloween-Themed Escape Room / Unlock the Box

games, Resources, Uncategorized

Each year for Halloween, we have an event called the Halloween Heist. Each year the Heist looks a little different — one year it was a Scavenger Hunt, another year a murder mystery party.

This year I decided to take inspiration from Escape Rooms and do an Unlock the Box-style event. There would be 4 “safes” that students would try to unlock. They would complete a series of puzzles to do so.

We did this with our high schoolers, and had them play the games as a small group. I think you could do this with any size group, and just adjust the prizes for your group’s culture. Our students had a blast, and I think we will do this type of event again!

Here are the details/script for the host:

  • Welcome to the Halloween Heist
  • The objective this evening is to solve all your puzzles first and crack the code to the safe
  • The first four teams to do so will win a fabulous prize. All four safes have the same code, but if you’re first place you will want to go for the largest prize, second place the second largest, etc.
  • The puzzles are in each room of the Lodge. You can do 1 through 5 in any order, and there is no limit of how many can work on a puzzle in the same room. (YOU COULD ALSO PLAY THIS THAT THEY COMPLETE EACH PUZZLE IN THAT ROOM, 1 THROUGH 5)
  • Do not cheat. Do not use google or a calculator.
  • When you are finished with each puzzle, a puzzle master may check it for you.
    • (LEADER) is the Puzzle Master upstairs, (LEADER) the Puzzle Master downstairs.
    • If you’re not correct, you’ll need to correct your puzzle.
    • We will have extra puzzles in case you have to start over.
    • If you’re stumped, the puzzle master may give you one clue.
  • Play to the strengths of your team, and work on it together.
  • When done with all 5, you will come get the final puzzle from me right here. When you have the final answer, it will be the combination to the lock. Come up and try your combination to win!

DOWNLOADS THE HEIST HERE:

These are the puzzles and answer keys.

ABOUT THE SAFES:

I chose to place locks on toolboxes and fill the toolboxes with prizes. We had small groups play together, so I placed in a treasure trove of snacks and Halloween candy that they could enjoy over time.

We also did gift cards to Dominoes and Starbucks that groups could use to enjoy together. We did this with our high schoolers, who often meet off-site or meet during an eating time. They were very excited about this!

Bob Ross Painting Night!

games, Resources, Uncategorized, youth ministry

Hi friends!

It has been a LONG TIME since I have posted, HOWEVER I did something really cool with students at our Overnighter last month, and I wanted to share it with you here!

First of all — I LOVE Overnighters, and I realize I’m overdue with an “official” post on why they are so great, and what we do at them! But the basic trick to them is this: scheduling something every hourish to keep students engaged. This year, we added “Bob Ross” hour at 2am! That’s right, 100 middle schoolers were invited to paint along to a Bob Ross Video at TWO A.M. And you know what? It was a SUCCESS!

HERE’S HOW I PREPPED:

The most important part was choosing the right video. I wanted it to be simple enough we could follow along — especially since “real” painters use a variety of brushes and paint colors. Here is the video I chose:

HERE’S WHAT I PURCHASED:

  • Paint Tray Palettes. You could also, of course, use paper plates — but this was a really easy way for us to issue paint to students!
  • Spatulas. We also used plastic knives too — which worked just fine.
  • Fan Brushes. This is a variety pack — the size differences did not seem to matter.
  • Acrylic paint. Bob uses oil paint, but that was not realistic when painting with students. I purchased 3 cases for around 65 paintings. We only used one, and maybe an additional white.
  • One-inch brushes. Bob uses 2-inch brushes, but since we use a very tiny canvas, this worked better for us!
  • 8×10 Canvas – This was the best bang for our buck, and worked just fine for our paintings. Each size item we purchased accompanied this size canvas perfectly.
  • Flat Brushes – I don’t think Bob actually uses anything like this, but it’s nice to have a “normal” paint brush.

HERE’S WHAT WE DID:

  • On each table, we set up cups of water, paper towels, and extra plates so that students could use them to blend colors
  • We learned the hard way: You should also put down plastic tablecloths or butcher paper.
  • On the Palettes, we put white in the center. Then we used the rest of the colors for the other holes. The only colors you don’t need are pink and orange. We also had adults do this — it was easier to create an assembly line than have students do theirs themselves.
  • We passed out canvas and permanent markers first and told students to sign their names on the back. The canvases we used give space for students to even name their paintings!
  • I led this activity, and painted along. I would tell students to listen to Bob fully, then I’d pause it after he did something and allow students to catch up.
  • We let students “skip” painting the parts that they didn’t love. As it gets to the end and Bob starts doing the bushes and the path, it doesn’t make sense at first. This would be an awesome thing to preach on, if you have a message that evening! Sometimes you can’t see what God is doing, but if you go along with it you might get something beautiful and unexpected.

Here is a look at my painting (the best art I’ve ever done!) and a few other pictures of our activity!

IMG_1524
IMG_1519
IMG_1520
IMG_1521

I would 10/10 do again! We finished around 3am, and they were dried and ready by 7am. We had several kids get frustrated (our boys, let’s be honest) and trashed so they could play foosball or “reinterpreted” their paintings, as you can see. But overall, everyone loved the activity.